
Outline for Homemade Cruffins
Welcome to the delightful world of homemade cruffins! If you’re reading this, you’re likely craving something scrumptious that combines the best of both a croissant and a muffin. Let’s dive in and unravel this captivating pastry that will soon become a beloved addition to your baking repertoire.
Understanding the Magic Behind Cruffins
Cruffins are a fantastic creation that merge flaky, buttery croissant dough with the ease of muffin-making. If you've ever enjoyed the layered decadence of a croissant combined with a soft muffin, you're in for a treat. These pastries are beautifully airy and can be filled with your choice of decadent fillings like Nutella or homemade lemon curd. It’s like biting into a dream!
What sets homemade cruffins apart from the cafe-counter versions is that you can customize them to your liking. Maybe you're a cinnamon-sugar aficionado, or perhaps you’d prefer a splash of fruit jam. The options are endless! Just imagine starting your day with the warm, comforting aroma of freshly baked cruffins wafting through your kitchen.
The Right Ingredients Matter
Before we embark on this baking adventure, it's essential to gather the right ingredients. Here’s what you’ll need:
For the Dough
- Whole Milk: This is crucial for achieving the rich texture of your dough.
- Yeast: Instant or active dry works, but remember, yeast is the magic that makes the dough rise!
- Butter: Whether salted or unsalted, butter is your friend. It provides flavor and moisture.
- All-Purpose Flour and Salt: These are staples in any baker's pantry that form the foundation of your dough.
For Lamination
- Salted Butter: Trust me, European-style butter adds an unparalleled richness.
- All-Purpose Flour: Just a touch to keep the butter from sticking.
For Filling and Coating
- Granulated Sugar and Ground Cinnamon: Essential for creating that irresistible topping.
- Fillings like Nutella or Jam: The cherry on top, quite literally!
Pro Tip: Use high-quality ingredients, especially butter. It makes a world of difference in flavor and texture. Consider brands like Kerrygold for their rich and creamy profile.
Preparing Your Dough
Now that we've assembled our elements, let's get down to business—making the dough! This step is simple, but it requires attention to detail.
-
Mixing the Ingredients: Start by warming your milk and mixing it with yeast and sugar until it’s foamy. This step’s crucial as it activates the yeast, helping the dough rise beautifully.
-
Forming the Dough: Add in the softened butter, flour, and salt, then mix away. The key here is to develop a smooth consistency without overworking it. If you’re using a stand mixer, allow it to knead for about 5 minutes. If you're kneading by hand, remember to stretch and fold gently.
-
The First Rise: Once you've kneaded your dough, it’s time to let it rise in a warm environment. This usually takes about 2 hours. A great tip is to turn your oven on for a few minutes, turn it off, and place the dough inside covered with a towel—the warmth helps your yeast do its job.
The Art of Lamination
Here's where the fun begins! Laminating your dough creates those signature flaky layers in homemade cruffins. This process is all about folding butter into the dough, which can seem intimidating, but I promise it's easier than it looks.
-
After your first rise, roll out your dough and spread a layer of slightly softened butter. The butter needs to be malleable yet cool to prevent it from melting into the dough.
-
Fold the dough like a business letter—this is what creates layers. You'll repeat this process two more times, chilling the dough in between. The rest periods are critical; they allow the gluten to relax, making it easier to roll out.
Shaping Your Cruffins
This is arguably the most fun part! Once your dough is perfectly laminated and chilled, it's time to shape everything into those delightful muffins.
- Cutting the Dough: Roll out your laminated dough into a rectangle, then cut it into strips.
- Final Assembly: Here’s where that cinnamon-sugar comes into play. Sprinkle generously across the rolled-out dough. For an extra touch, don’t hesitate to layer on your preferred fillings—think Nutella or even some jam.
- Rolling Them Up: Take your strips and roll them into delicate spirals and place them in your greased muffin pan.
The Last Rise and Baking
With your cruffins shaped, let them rise for about an hour. This second rise is critical for achieving that fluffy texture. The dough should look puffy and promise a delightful result.
Now, onto the moment of truth—preheating your oven and baking! The cooking temperature is important here; ensure your oven is at 350°F (177°C). Bake until they’re gorgeously golden brown, and your kitchen is filled with an enchanting aroma that could make anyone weak at the knees.
Finishing Touches
Once baked, a delightful coating of cinnamon-sugar is a must. It adds that final layer of crunch and sweetness. If you wish to fill your cruffins, now is the time to do so! Using a piping bag, inject your chosen filling if you want to elevate the experience.
Storing and Enjoying Your Homemade Cruffins
You and your friends might devour some on the spot, but if you have leftovers, here’s how to store them: keep covered at room temperature for up to 3 days. For longer storage, consider freezing them.
What’s Next After Making Homemade Cruffins?
Once you master homemade cruffins, there's no stopping! Play with flavors and fillings. Try different spices in your cinnamon-sugar or experiment with seasonal fillings like pumpkin spice or berry compote.
You could even explore different dough flavors, like chocolate croissant dough, to switch it up. The sky's the limit! Your newfound baking skills will impress friends and family alike, making them wonder how you became such a pastry extraordinaire.
Final Thoughts
Creating homemade cruffins may require a bit of time and effort, but trust me, the results are profoundly rewarding. Share these with your loved ones over coffee or brunch, and watch their faces light up with delight. Happy baking, and may your cruffins be ever fluffy and delightful!
Feel free to explore more baking tips and techniques, and enjoy this delicious journey of culinary creativity!
Introduction to Homemade Cruffins
What are cruffins and why you need to try them
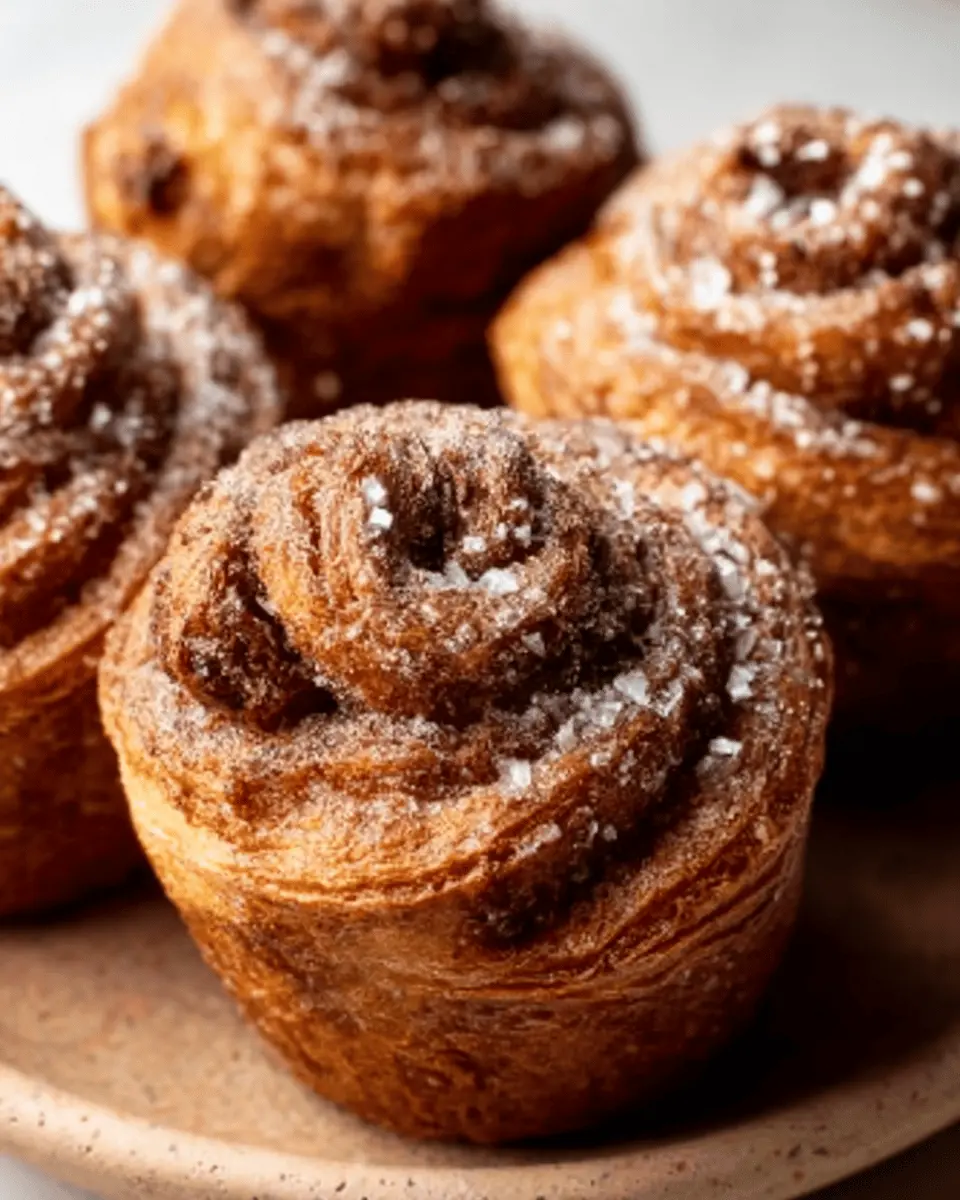
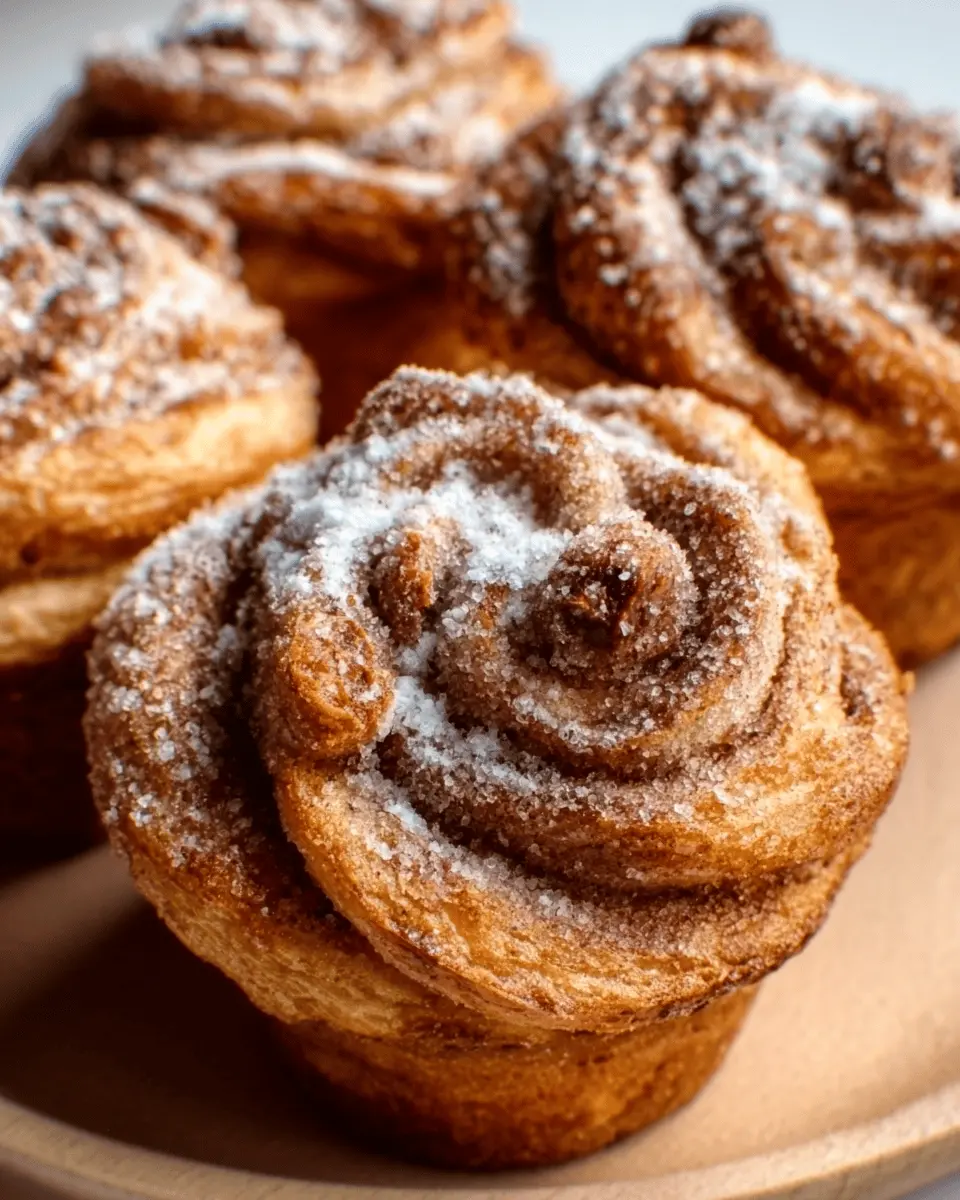
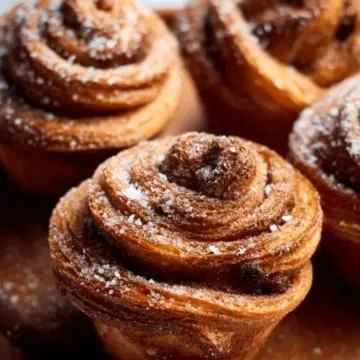
If you haven’t yet experienced the delightful homemade cruffins, you’re in for a treat! These sweet pastries combine the flaky, buttery goodness of croissants with the comforting shape of muffins, offering a unique twist on your typical baked goods. Picture this: layers of soft, pillowy dough are filled with a sugary cinnamon blend or even your favorite jam, then baked to golden perfection in a muffin pan. The result? Flaky, fluffy bites of joy that are a feast for both the eyes and your taste buds.
One of the reasons cruffins are a must-try is their versatility. You can tweak the filling to suit your taste—Nutella or lemon curd, anyone? They are perfect for brunch gatherings, cozy evenings at home, or even as a delightful gift for friends. Plus, making these at home allows you to impress guests with your baking skills, as you create bakery-quality treats right in your kitchen! Don’t be intimidated by the process; this recipe guides you step-by-step, ensuring tasty success. Trust me, once you sink your teeth into a freshly baked cruffin, you’ll wonder why you didn’t try making them sooner!
Ingredients for Homemade Cruffins
Creating the perfect homemade cruffins is all about selecting the right ingredients. Let's break down what you'll need for each delicious component.
Essential Ingredients for the Dough
- Whole Milk: 1 cup (240ml), warmed to about 110°F (43°C) for yeast activation.
- Instant or Active Dry Yeast: 2 and ¼ teaspoons (7g), to give our dough that lovely rise.
- Granulated Sugar: 3 tablespoons (38g), for a touch of sweetness.
- Unsalted or Salted Butter: 3 tablespoons (43g), softened for a rich, buttery flavor.
- All-Purpose Flour: 3 cups (375g), plus extra for dusting, to create a fluffy texture.
- Salt: 1 and ¼ teaspoons, balancing the sweetness.
Ingredients for Laminating the Dough
Laminating the dough adds those beautiful layers! You'll need:
- Salted Butter: 1 cup (226g), slightly softened, to envelop the dough.
- All-Purpose Flour: 1 tablespoon, to help with the rolling process.
Filling and Coating Options
This is where creativity kicks in! Here are some delightful options:
- Cinnamon-Sugar Mixture: ¾ cup (150g) granulated sugar mixed with 1 tablespoon ground cinnamon for that warm flavor.
- Optional Fillings: Consider using Nutella, jams, lemon curd, or pastry cream for an exciting twist.
These ingredients come together to make your homemade cruffins a truly delightful treat! Looking for more tips on ingredient preparation? Check out Sally’s Baking Addiction for detailed techniques.

Step-by-Step Preparation for Homemade Cruffins
Creating homemade cruffins is like bringing the bakery to your kitchen. With a combination of buttery layers and delicious fillings, they’re a game-changer for brunch or a sweet afternoon treat. Here's a step-by-step guide to help you master this delicate pastry from preparation to baking.
Prepare the Dough
Begin by whisking together warmed whole milk, yeast, and sugar in your stand mixer’s bowl. Let this mixture sit for about five minutes until it becomes frothy. This step is crucial; it’s how you ensure your yeast is activated and your cruffins will rise beautifully! If you don’t have a mixer, don’t fret—mix by hand with a large bowl and wooden spoon.
Once your yeast mixture is ready, add in butter, flour, and salt. Mix on medium speed for around two minutes, scraping down the sides to combine everything. The final consistency should be soft, pulling away from the bowl edges but still slightly tacky. Think of it as the perfect dough cuddle!
Knead the Dough
Now that your dough is in shape, it’s time to knead! If you're new to kneading, you can check out a handy video tutorial here. Aim for about five minutes of kneading on a floured surface. The dough should feel soft yet resilient—perfect for lamination later!
The First Rise
After kneading, place your dough into a lightly greased bowl, turning to coat all sides. Cover it tightly and let it rise in a warm environment for about two hours until nearly doubled. Pro tip: if you’re looking for a bit of guidance on where to let your dough rise, check this Baking with Yeast Guide.
Lamination Process
Now comes the fun part: creating those flaky layers! Start by chilling your dough. Flatten it into a rectangle and store it in the fridge for about 20 minutes. While it chills, prepare your lamination butter by mixing softened butter with a spoonful of flour to make it spreadable. After 20 minutes, you’ll fold and roll your dough multiple times, resting it in the fridge in between. This process is what gives cruffins their delightful layers!
Shape and Fill the Cruffins
Once your dough is laminated perfectly, cut it into sections to start shaping. Roll each section into a rectangle, sprinkle with cinnamon-sugar (or whatever filling you fancy), and cut into strips. Layer the strips together, roll them up like a sweet spiral, and tuck them into your prepared muffin pan. This step is where the magic begins—don’t skip the filling!
Final Rise and Bake
After shaping, let your cruffins rise until puffy—about an hour. Preheat your oven to 350°F (177°C) and prepare for baking! Bake them for 25 to 28 minutes until they're golden brown and irresistibly aromatic. Let them cool, then enjoy straight away or roll them in more cinnamon-sugar for an extra treat!
By following these steps, you’ll be well on your way to enjoying fluffy, flaky homemade cruffins that will impress family and friends alike. Enjoy the process, and don’t forget to taste along the way!
Variations on Homemade Cruffins
Chocolate-filled Cruffins
Craving something decadent? Chocolate-filled homemade cruffins might just be your new obsession! Simply melt some chocolate or grab your favorite chocolate spread (Nutella works perfectly!) and use it as a filling before rolling your dough. The rich, gooey center adds an indulgent twist, making them perfect for dessert or a special brunch treat.
Fruit-filled Cruffins
If you’re leaning towards a fruity flavor, opt for jam or lemon curd as your filling. Spread a thin layer over your rolled-out dough before cutting and rolling. Think of it like a fruit pastry reinvented into a cruffin—light and refreshing! You could even experiment with seasonal fruits, using homemade fruit preserves for a personal touch. The fruity explosion inside is sure to brighten anyone's day!
Whether you're in the mood for rich chocolate or vibrant fruit, these variations on homemade cruffins will surely please any palate. Happy baking!
Cooking Tips and Notes for Homemade Cruffins
Best practices for dough handling
When making homemade cruffins, handling your dough with care is crucial. Ensure your hands are floured to prevent sticking, and avoid overworking it. If you encounter stubborn dough, let it rest for 5 minutes to relax the gluten. This will make rolling and shaping easier. Don’t forget that a clean work surface, like a silicone baking mat, can make all the difference.
Tips for perfect lamination
Achieving those beautiful flaky layers is all about proper lamination. During this process, keep your butter cool but pliable—roughly between 60–64°F. If your dough feels tough to roll out, a quick chill in the refrigerator can help relax the gluten again. Remember, flouring your rolling pin and work surface is essential; it keeps your dough from tearing and allows for a smoother roll. For a deeper dive into lamination techniques, check out King Arthur Baking.
Serving Suggestions for Homemade Cruffins
Pair with Coffee or Tea
There's nothing like enjoying your homemade cruffins alongside a steaming cup of coffee or tea. The buttery, flaky layers of the cruffin beautifully complement a rich espresso or a delicate herbal tea. For a cozy morning ritual, try pairing them with a vanilla latte or a chai to enhance the warm cinnamon flavor.
Serve as Part of a Brunch Spread
Whether you're hosting friends or savoring a delightful weekend morning, making homemade cruffins part of your brunch spread is a surefire hit. Include items like turkey bacon, chicken ham, fresh fruit, and an array of spreads such as cream cheese or fruit preserves. This not only adds variety but also elevates the dining experience, making it visually appealing and absolutely delicious!
A well-rounded brunch is a great opportunity to experiment with different filling options for your cruffins, too. Consider trying Nutella or lemon curd for a refreshing twist.
Time Breakdown for Homemade Cruffins
Preparation Time
The preparation for these delicious homemade cruffins takes about 4 hours and 45 minutes. This includes the time to mix and knead the dough, allow it to rise, and go through the lamination process.
Cooking Time
Once your cruffins are beautifully shaped and risen, you’ll need about 25 minutes to bake them to golden perfection.
Total Time
In total, you're looking at roughly 5 hours and 45 minutes, which includes the cooling time. While it may seem like a time investment, the delightful combination of flaky layers and sweet filling is totally worth it!
For more guidance, don't forget to check out resources like Sally's Baking Addiction for tips and tricks on perfecting your baking adventures.
Nutritional Facts for Homemade Cruffins
Calories
Each homemade cruffin packs around 210 calories, making it a delightful treat that's easy to indulge in. Pair it with your morning coffee for an epic start to your day or enjoy it as an afternoon pick-me-up.
Sugar Content
With roughly 10 grams of sugar per cruffin, these pastries offer a sweet bite that satisfies your cravings without overwhelming you. A perfect balance, don’t you think?
Fat Content
Expect about 12 grams of fat in each homemade cruffin, primarily from the buttery layers that create that irresistible flakiness. This fat content is just enough to deliver that indulgent flavor while allowing you to enjoy them responsibly.
For more information on the benefits of various ingredients, check out resources from the USDA or Harvard Health to stay informed about making nutritious choices!
FAQs about Homemade Cruffins
How can I make cruffins less messy?
Mess tends to happen when rolling out the dough and adding fillings. To keep it tidy, use a silicone baking mat, which prevents slipping and sticking. Additionally, lightly flour your work surface and rolling pin to minimize dough sticking. If things do get messy, simply keep a damp towel nearby for quick clean-ups during preparation.
Can I prepare the dough the night before?
Absolutely! You can prepare the dough the night before to save time. Simply cover the shaped cruffins in the muffin pan and refrigerate them for up to 12 hours. Just remember to let them rise for about an hour at room temperature before baking them the next day.
What are good fillings for cruffins?
Fillings can truly elevate your homemade cruffins! Popular choices include:
- Nutella
- Jam or preserves
- Lemon curd
- Pastry cream
Feel free to get creative! You might even try savory options like cheese or herb spreads for a unique twist.
Conclusion on Homemade Cruffins
Final thoughts on enjoying homemade cruffins
Creating homemade cruffins is a delightful adventure that combines the best of baking techniques with generous layers of flavor. As you savor your freshly baked cruffins, remember that experimenting with fillings can make each batch unique. Enjoy them warm or filled, and don’t hesitate to share your tasty results with friends! For additional tips, check out Sally's Baking Addiction for inspiration.
Homemade Cruffins
Equipment
- Stand Mixer
- Muffin Pan
- Rolling Pin
- Cooling Rack
- piping bag
- Pizza Cutter
Ingredients
Dough
- 1 cup whole milk warmed to about 110°F (43°C)
- 2.25 teaspoons instant or active dry yeast (1 standard packet)
- 3 Tablespoons granulated sugar
- 3 Tablespoons unsalted or salted butter softened to room temperature and cut into 3 pieces
- 3 cups all-purpose flour [spooned & leveled]
- 1.25 teaspoons salt
Lamination
- 1 cup salted butter slightly softened
- 1 Tablespoon all-purpose flour
Filling & Coating
- 0.75 cup granulated sugar
- 1 Tablespoon ground cinnamon
- 6 Tablespoons optional fillings Nutella, jam, lemon curd, or pastry cream
Instructions
Preparation
- Whisk the warm milk, yeast, and sugar together in a mixing bowl. Cover and let sit until foamy, about 5 minutes.
- Add butter, 2 cups of flour, and salt. Beat on medium speed for 2 minutes.
- Add remaining flour, scraping down the bowl as needed, and beat until a soft dough forms.
- Knead the dough for 5 minutes until slightly tacky and elastic.
- Place dough in a greased bowl, cover, and let rise for about 2 hours until nearly doubled.
- Punch down the dough, flatten, and place in the refrigerator for 20 minutes.
Lamination
- Prepare butter for lamination by beating with flour until combined.
- Roll dough out, add butter, fold, and refrigerate for 20 minutes.
- Repeat folding and refrigerating two more times.
Shaping & Baking
- Preheat the oven to 350°F (177°C).
- Prepare muffin pan and mix sugar and cinnamon.
- Roll out portions of dough, sprinkle with cinnamon-sugar, and cut into strips.
- Roll strips and place in muffin pan. Allow to rise for 1 hour.
- Bake for 25-28 minutes until golden brown and internal temperature reaches 200°F (93°C).
Finishing Touches
- Roll warm cruffins in remaining cinnamon-sugar and fill if desired.
Leave a Reply