
Introduction to Homemade Bread
Making homemade bread is nothing short of a culinary revolution for young professionals. In today’s fast-paced world, where convenience often trumps quality, whipping up a loaf at home can feel like an empowering act. Not only is it a skill that connects us to our roots, but it also offers a plethora of benefits that store-bought bread simply can’t match.
Why Homemade Bread is a Game-Changer for Young Professionals
-
Healthier Ingredients: By baking at home, you have complete control over what goes into your bread. Skip the preservatives and additives often found in store-bought options, and opt for wholesome ingredients instead.
-
Cost-Effective: Baking your own bread can save you money in the long run, especially if you enjoy sandwiches for lunch or toasted bread for breakfast.
-
Therapeutic Experience: Kneading dough can serve as a fantastic stress reliever, turning your kitchen into a sanctuary of creativity. As you mix, knead, and shape, you’ll find a moment of calm amidst your busy day.
-
Impressive End Result: There’s something undeniably satisfying about pulling a freshly baked loaf from the oven. Sharing this warm, aromatic goodness with friends or colleagues can elevate your meals from ordinary to extraordinary.
So why not roll up those sleeves and embark on your homemade bread adventure? Your taste buds—and wallet—will thank you! For more inspiration, check out this informative guide.
Ingredients for Homemade Bread
Essential ingredients for the perfect loaf
Making homemade bread is a delightful process that requires just a few essential ingredients. You’ll need:
- Warm water: Acts as the foundation for activating yeast. Aim for a temperature between 105-115°F.
- Active dry yeast: The driving force behind the rise! Make sure it’s fresh for the best results.
- Honey or sugar: Sweetens your loaf and helps with yeast fermentation.
- Salt: Enhances flavor and strengthens gluten structure.
- Oil: Adds moisture and richness. Canola or vegetable oil works beautifully.
- Flour: All-purpose or bread flour will give you the best texture.
Each ingredient plays a critical role in achieving that perfect loaf, balancing flavor, texture, and rise.
Optional add-ins for flavor enhancement
Ready to jazz up your homemade bread? Consider adding some optional ingredients like:
- Herbs: Look to rosemary or thyme for an aromatic twist.
- Nuts or seeds: Adding walnuts or sunflower seeds can give a crunchy texture.
- Cheese: A little cheddar or mozzarella can elevate your bread to new savory heights.
These delightful enhancements can turn your basic loaf into a standout creation! For expert advice on choosing the right herbs, check out this resource on baking with herbs.
Step-by-step Preparation of Homemade Bread
Making homemade bread can seem daunting, but with a clear process, you'll find it's more rewarding than you might think! Here’s a friendly guide to help you through each step—before you know it, you'll be enjoying the aroma of freshly baked bread wafting through your home.
Gather your ingredients and equipment
Before diving in, ensure you have everything at hand. That includes:
-
Ingredients:
-
2 cups warm water (105-115 degrees)
-
1 tablespoon active dry yeast
-
¼ cup honey or sugar
-
2 teaspoons salt
-
2 tablespoons oil (canola or vegetable)
-
4-5.5 cups all-purpose or bread flour
-
Equipment:
-
A loaf pan to shape your bread
-
A stand mixer or a mixing bowl and a wooden spoon
Take a moment to check that your yeast is fresh; this will guarantee a fluffy loaf.
Prepare the yeast mixture
Start by mixing the warm water, yeast, and a pinch of honey or sugar in your bowl or mixer. Let it sit for about 5-10 minutes. You'll know it's ready when it becomes bubbly and foamy—this is known as “proofing” the yeast. If it doesn’t foam, you might need to use fresher yeast to ensure your homemade bread rises properly.
Combine the ingredients to form the dough
To the bubbly yeast mixture, add the remaining honey or sugar, salt, oil, and 3 cups of flour. Mix until well-combined. Gradually incorporate more flour until the dough pulls away from the sides of the bowl and feels slightly sticky yet elastic.
Knead the dough for the perfect texture
Now it’s time to knead! You can either do this by hand on a floured surface for about 5-8 minutes or let your mixer do the work at medium speed for 4-5 minutes. The goal is a smooth, elastic dough that’s slightly tacky but not overly sticky.
Allow the dough to rise and double in size
Place your kneaded dough in a greased bowl, turning it to coat in oil. Cover it with a towel or plastic wrap and let it rise in a warm place. This should take about 1 ½ hours. Patience here is key—you’ll see it double in size!
Shape the dough and let it rise again
After the first rise, punch down the dough gently to remove air bubbles. Divide it into two equal parts and shape each into logs. Place them in greased loaf pans, cover them again, and let them rise for another 45 minutes to an hour.
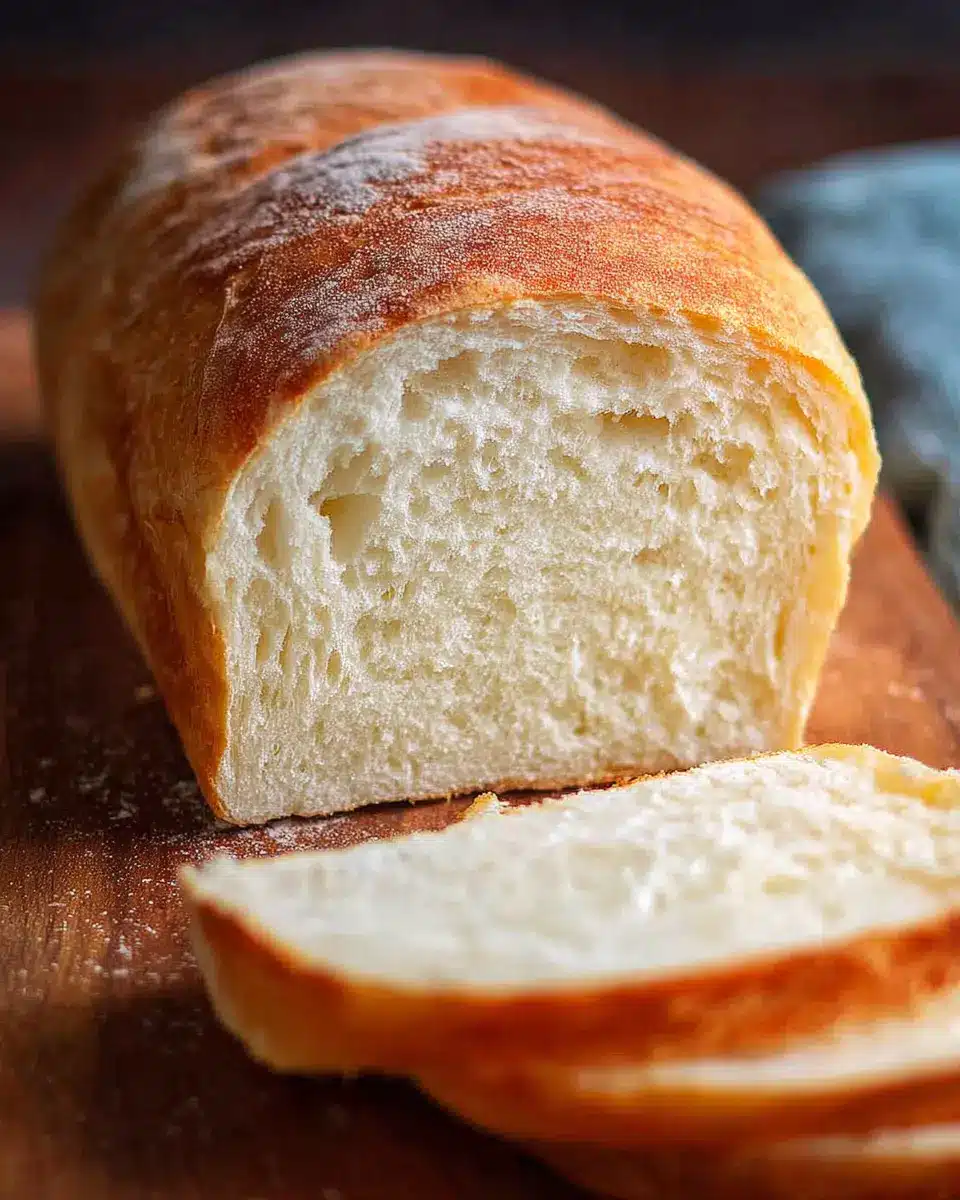
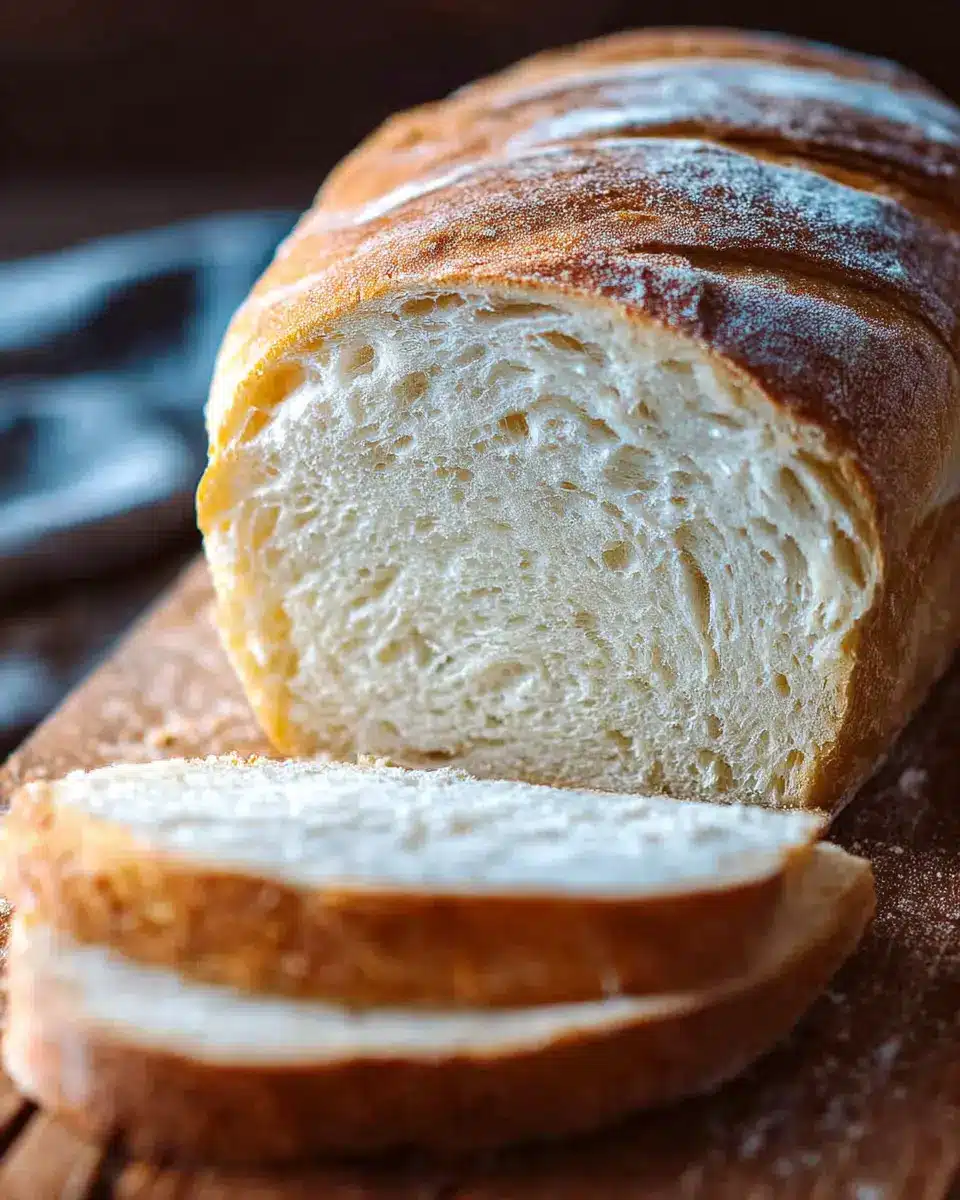
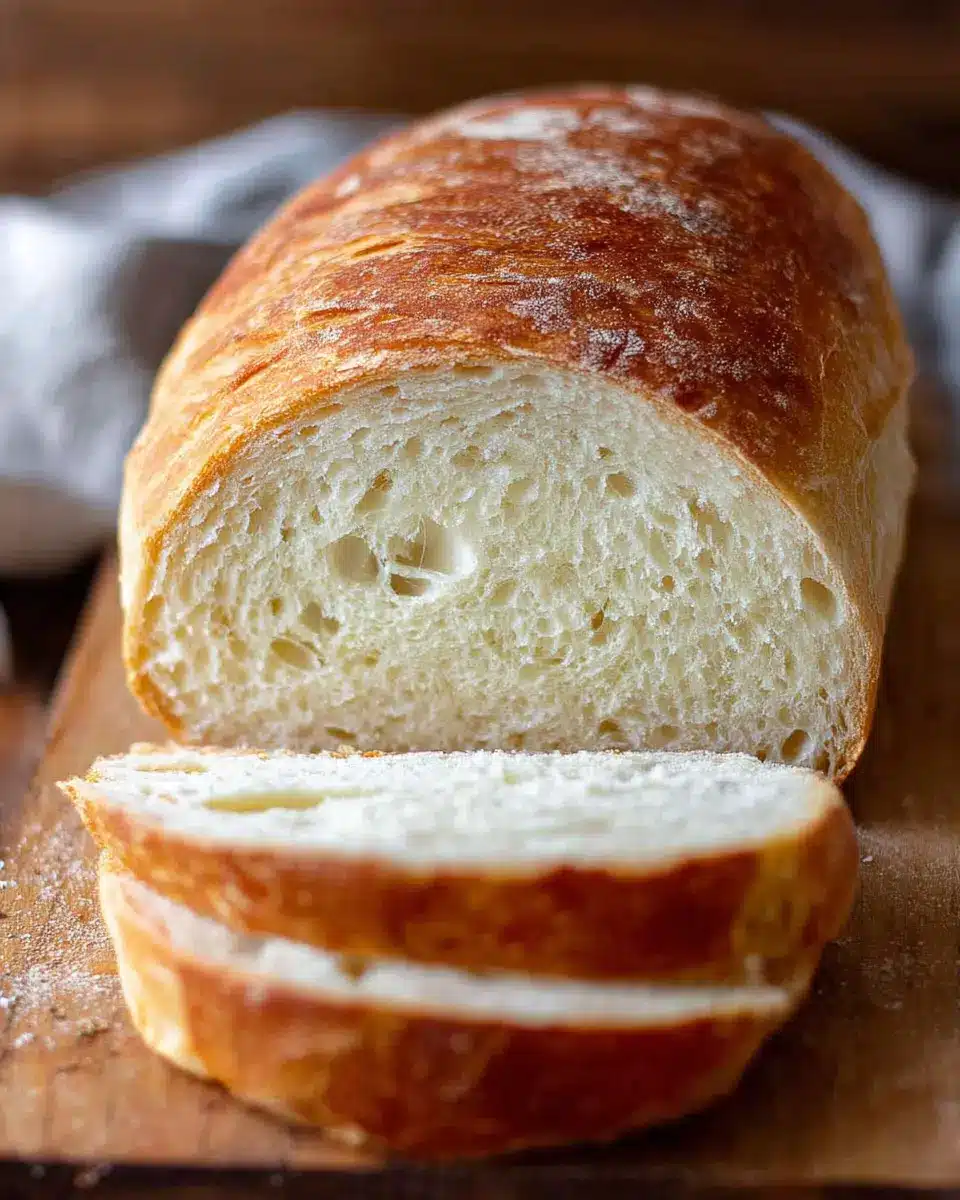
Bake the bread to golden perfection
Preheat your oven to 350°F. Once the dough has risen, bake for 30-33 minutes until golden brown. Tap the loaf's top gently; if it sounds hollow, it's done! Allow your loaves to cool, and don’t forget to brush some melted butter on top for that rich finish.
By following these easy steps, you're bound to create a delicious batch of homemade bread that will impress friends and family alike. Enjoy the journey and the delightful aromas that accompany homemade baking!
Variations on Homemade Bread
Whole Wheat Homemade Bread
For those seeking a healthier option, whole wheat homemade bread brings a delightful nutty flavor and a denser texture. Simply replace half to all of the all-purpose flour with whole wheat flour, adjusting the liquid slightly since whole wheat flour absorbs more moisture. This variation packs in more fiber and nutrients, making it a nutritious choice for sandwiches or toast. If you're curious about a dedicated whole wheat recipe, check out this Honey Whole Wheat Bread.
Herb-Infused Homemade Bread
Elevate your homemade bread experience by adding a burst of flavor with herb-infused bread. Incorporate fresh or dried herbs like rosemary, thyme, or basil into your dough during mixing. You can also create a savory twist by folding in minced garlic or sun-dried tomatoes. This aromatic bread pairs perfectly with soups and salads, making mealtime feel extra special. Why not experiment with your favorite herbs and let your taste buds guide you?
Cooking Tips and Notes for Homemade Bread
Troubleshooting Common Bread-Making Issues
If your homemade bread doesn’t rise as expected, check that your yeast is fresh. You can also ensure the water temperature is just right—too hot can kill the yeast. If your bread is too dense, consider kneading longer to develop gluten. Sometimes, simply letting the dough rise a bit longer can make a huge difference!
Best Practices for Storing Homemade Bread
To keep your homemade bread fresh, store it in an airtight container or plastic bag at room temperature for up to 3 days. For longer storage, wrap it tightly in plastic wrap and freeze for up to 3 months—just remember to slice it beforehand for easy access! Thaw at room temperature or in the refrigerator overnight for the best texture.
For more tips and a comprehensive guide, check out King Arthur Baking.
Serving Suggestions for Homemade Bread
Delicious toppings and spreads for your fresh bread
Transform your homemade bread into a scrumptious delight with a variety of toppings and spreads. Here are some irresistible options:
- Avocado toast topped with crushed red pepper flakes.
- Cream cheese with fresh herbs for a savory bite.
- Turmeric hummus for a vibrant and nutritious spread.
- Nut butters like almond or peanut for a sweet breakfast option.
- Turkey bacon or chicken ham for hearty sandwiches.
Feel free to layer multiple spreads for a decadent treat!
Creative uses for leftover bread
Don’t let your leftover homemade bread go to waste! Here are some quick ideas to repurpose it:
- Breadcrumbs: Blend dried bread into breadcrumbs for coating or as a filler in meatballs.
- Croutons: Cube and toast stale bread to make croutons for salads and soups.
- French toast: Revive old slices in a delicious French toast recipe for a cozy breakfast.
Getting creative with your leftovers not only reduces waste but also adds exciting new dishes to your menu!
Time Breakdown for Homemade Bread
When embarking on your journey to create homemade bread, it’s essential to know how to manage your time. Here’s a breakdown of the different stages you'll experience:
Preparation Time
Dedicate approximately 15 minutes to gather your ingredients and mix the dough. It’s a quick but crucial step that sets the foundation for your delicious bread.
Rising Time
Allow 3 hours for the dough to rise. This patience is key to developing that fluffy texture we all love.
Baking Time
Once your dough has risen, be ready to bake for 30 minutes. This is where the magic happens—watch your dough transform into a golden-brown loaf.
Total Time
From start to finish, you’re looking at about 3 hours and 45 minutes. Perfect for a weekend baking project or a leisurely afternoon!
With this breakdown, you'll be well-prepared for your homemade bread adventure! Happy baking!
Nutritional Facts about Homemade Bread
Calories per slice
Homemade bread typically contains around 202 calories per slice, making it a satisfying yet reasonably healthy option for sandwiches or toast.
Nutrients present in homemade bread
This delightful bread is rich in essential nutrients, including:
- Carbohydrates: 41g to fuel your day
- Protein: 5g for muscle repair
- Fat: 2g, with minimal saturated fat
- Fiber: 1g, aiding digestion
With low sodium and added iron, homemade bread not only pleases the palate but also supports your nutritional needs. For more details on the benefits of whole grain options, check out Whole Grains Council.
FAQ about Homemade Bread
How can I make my bread fluffier?
To ensure your homemade bread is light and fluffy, focus on two key elements: ingredient quality and dough handling. Use fresh yeast and ensure your water temperature is just right (around 105-115 degrees Fahrenheit). Knead the dough adequately for optimum gluten development, and allow it to rise in a warm environment. Consider adding a little extra flour if the dough feels too sticky, but avoid overdoing it; you want a soft, pliable dough.
What are the best storage methods for homemade bread?
The ideal way to store your homemade bread is in an airtight container or bag at room temperature for 2-3 days. For longer storage, refrigerate it for up to 5 days. If you want to keep it longer, slice the bread and freeze it in a resealable bag for up to three months. Thaw slices as needed for perfect, fresh toast any time!
Can I use gluten-free flour for this recipe?
Absolutely! You can use a gluten-free all-purpose flour blend instead of regular flour, but be aware that it may alter the texture slightly. Look for blends that specifically indicate they can substitute directly for wheat flour. Additionally, consider adding some xanthan gum to mimic the elasticity that gluten provides. For more tips, check out resources like Gluten-Free Living.
Conclusion on Homemade Bread
Embracing the Joy of Making Homemade Bread at Home
There's nothing quite like the aroma of freshly baked homemade bread wafting through your kitchen. By taking the time to create your own loaf, you're not just preparing a meal but cultivating a sense of satisfaction and joy. Enjoy the process, share your creation, and savor those delicious moments!

Homemade Bread
Equipment
- loaf pan
- Bosch Mixer
Ingredients
- 2 cups warm water (105-115 degrees)
- 1 Tablespoon active dry yeast
- ¼ cup honey or sugar (85g honey, 50g sugar)
- 2 teaspoons salt
- 2 Tablespoons oil (canola or vegetable)
- 4 - 5 ½ cups all-purpose or bread flour (500g-688g)
Instructions
Instructions
- In a large bowl or stand mixer add the yeast, water and a pinch of the sugar or honey. Allow to rest for 5-10 minutes until foaming and bubbly.
- Add remaining sugar or honey, salt, oil, and 3 cups of flour. Mix to combine.
- Add another cup of flour and mix to combine. With the mixer running add more flour, ½ cup at a time, until the dough begins to pull away from the sides of the bowl.
- Mix the dough for 4-5 minutes on medium speed or knead with your hands on a lightly floured surface for 5-8 minutes.
- Grease a large bowl with oil or cooking spray and place the dough inside, turning to coat. Cover with a dish towel or plastic wrap and allow to rise in a warm place until doubled in size, about 1 ½ hours.
- Spray two 9x5'' bread pans generously with cooking spray. Punch the dough down well to remove air bubbles and divide into two equal portions.
- Shape each ball into long logs and place into greased loaf pans. Cover pans and allow dough to rise again for about 45 minutes to one hour.
- Preheat oven to 350 F. Bake bread for about 30-33 minutes, or until golden brown on top.
- Invert the loaves onto a wire cooling rack. Brush the tops with butter and allow to cool for at least 10 minutes before slicing.
- Store in an airtight container or bag for 2-3 days at room temperature, or up to 5 days in the refrigerator.


Leave a Reply