
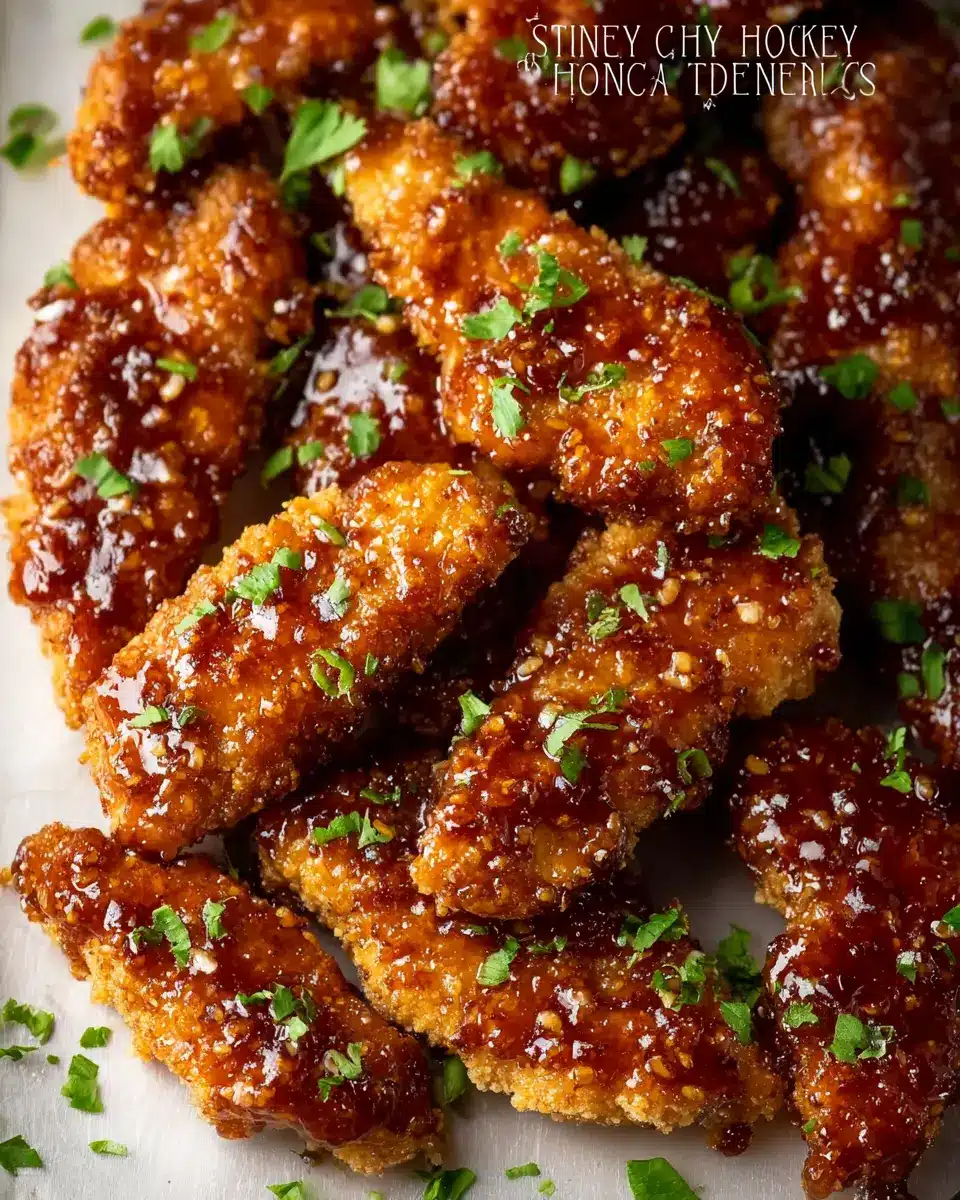
Introduction to Sticky Honey Garlic Chicken Tenders
If you’re looking for a dish that combines sweet, savory, and a hint of spice, then sticky honey garlic chicken tenders are your new go-to recipe. Imagine a crispy exterior giving way to tender chicken, all generously coated in a luscious honey garlic sauce. Not only are these tenders incredibly delicious, but they are also simple to prepare, making them perfect for busy weeknights or laid-back gatherings with friends.
Why You Need These Chicken Tenders in Your Life
Life can be hectic, and you might often find yourself craving something quick yet satisfying. These chicken tenders fit the bill perfectly! They appeal to both adults and kids, making dinner times less chaotic and more enjoyable. Plus, you can choose to bake for a healthier version or fry for that extra crunch—your kitchen, your rules!
And let’s not forget the versatility! Serve these sticky honey garlic chicken tenders with a side of steamed veggies or toss them into a salad for a delightful meal. With just a handful of ingredients, you can whip up a dish that’s sure to impress anyone.
So, are you ready to experience the magic of sticky honey garlic chicken tenders? Let’s dive into the recipe!
Ingredients for Sticky Honey Garlic Chicken Tenders
Main ingredients
Creating delicious sticky honey garlic chicken tenders starts with a few key components. Here’s what you’ll need:
- 2 pounds (907 g) boneless skinless chicken breast or chicken tenderloins for quick cooking and tender bites.
- 1 cup (60 g) panko breadcrumbs for that extra crunch; you can swap in regular breadcrumbs if you prefer.
- 2 eggs to help the breadcrumbs stick, making each bite irresistibly crispy.
- ¾ cup (100 g) all-purpose flour for a light coating that adds texture.
- 1 teaspoon (5 ml) kosher salt to enhance the flavors.
- Fresh cracked black pepper to taste, alongside any other preferred seasonings.
Sauce ingredients
Now, let’s get to the sweet and savory goodness! For that tasty sauce, gather these ingredients:
- ½ cup (120 ml) ketchup for a tangy base.
- ½ cup (120 ml) honey to bring natural sweetness that caramelizes beautifully.
- ¼ cup (60 ml) soy sauce for a savory punch; a touch of fish sauce can also be delightful!
- 1 Tablespoon (15 ml) chili garlic sauce (optional) for a hint of heat.
- 2 Tablespoons (15 ml) fresh lime juice or rice vinegar to balance flavors.
- 1 teaspoon cornstarch for thickening the sauce perfectly.
With these ingredients, you’re all set to whip up a batch of sticky honey garlic chicken tenders that will wow your friends and family! If you're looking for where to find any of these ingredients, be sure to check local grocery stores or visit Amazon for quick delivery!
Step-by-step Preparation of Sticky Honey Garlic Chicken Tenders
Cooking sticky honey garlic chicken tenders at home is a delightful experience that fills your kitchen with mouthwatering aromas. With just a few simple steps, you can create a dish that's packed with flavor and bound to impress. Let’s dive right into the preparation process!
Preheat the oven and prepare the baking sheets
Start by preheating your oven to 425°F (220°C). While it’s heating up, line one or two baking sheets with parchment paper. Not only does this help with easy cleanup, but it also prevents the chicken from sticking, ensuring you get that perfect crispiness.
Cut and season the chicken strips
If you’re using boneless chicken breasts, now's the time to cut them into strips. Aim for uniform thickness to ensure they cook evenly. You want them about 1 inch wide. To elevate the flavor profile, season the strips liberally with kosher salt, fresh cracked black pepper, and any other additional seasonings you enjoy—think garlic powder or smoked paprika, for instance.
Set up the breading stations
Creating a breading assembly line will make your life easier! Set up three bowls:
- In the first bowl, add all-purpose flour mixed with a teaspoon of salt and pepper.
- In the second bowl, beat together two eggs.
- The last bowl should hold panko breadcrumbs or regular breadcrumbs if that’s what you have on hand. This will give your tenders that delightful crunch!
Dredge the chicken strips
Now, it’s time for the fun part! Take each chicken strip and dredge it first in the flour mixture, then dip it into the egg, and finally coat it with the breadcrumbs. Lay each coated strip onto the baking sheet. Make sure each piece gets a good layer of breadcrumbs for that extra crispiness!
Bake the chicken
Place your baking sheet in the oven and bake the strips for about 15 minutes. At the halfway point, flip them over to ensure they’re evenly golden. After that initial bake, let them go for another 5 to 10 minutes until they’re nice and crisp.
Whisk together the sauce ingredients
While your chicken is baking, it’s time to whip up the star of the show—your sauce! In a medium bowl, mix together ketchup, honey, soy sauce, chili garlic sauce, lime juice, and a teaspoon of cornstarch. This combination will create a lovely, sticky glaze that perfectly complements the chicken.
Cook the chicken with the sauce
Heat a large skillet over medium heat and add half of the baked chicken strips along with half of the sauce. Toss to coat for about 30 seconds to a minute on each side. You want the chicken to soak up that sticky honey garlic glaze, making it irresistible. Repeat this with the remaining chicken and sauce.
Now, your sticky honey garlic chicken tenders are ready to serve! Enjoy them as a fantastic main course or a fun appetizer for your next gathering. Bon appétit!
Variations of Sticky Honey Garlic Chicken Tenders
Adding Spice with Hot Sauce
For those who enjoy a little kick, consider adding a splash of hot sauce to your sticky honey garlic chicken tenders. It’s a simple way to elevate the flavors without compromising the sweetness. Options like sriracha or a smoky chipotle hot sauce will complement the honey and garlic beautifully. Just a tablespoon can go a long way, so adjust to your taste!
Experimenting with Different Sauces
Feel free to get creative with the sauce. Substitute the soy sauce with teriyaki or even a homemade barbecue sauce for a unique twist. If you're feeling adventurous, mix in some peanut butter for an Asian-inspired flavor, or swap the honey for maple syrup for a different sweet profile. The beauty of this recipe is its versatility—so don’t hesitate to experiment and find your perfect combination!
For more creative ideas, check out this easy chicken tender marinade guide!
Cooking Tips and Notes for Sticky Honey Garlic Chicken Tenders
Ensuring Optimal Crispiness
To achieve the ultimate crispiness for your sticky honey garlic chicken tenders, make sure to use panko breadcrumbs. They create a light, crunchy texture that regular breadcrumbs can't match. For an extra crispy bite, consider frying your chicken tenders in hot oil (around 375°F) for that golden perfection! Just remember, once you toss them in the sauce, they’ll lose some of that crunch, so serve immediately for the best experience.
Storing Leftovers
If you have leftovers (which, let’s be honest, might not happen), store your chicken tenders in an airtight container in the fridge for up to 3 days. To reheat, pop them back in the oven at 350°F for about 10 minutes to maintain their crispy exterior. Enjoy the delightful flavors even on the second day!
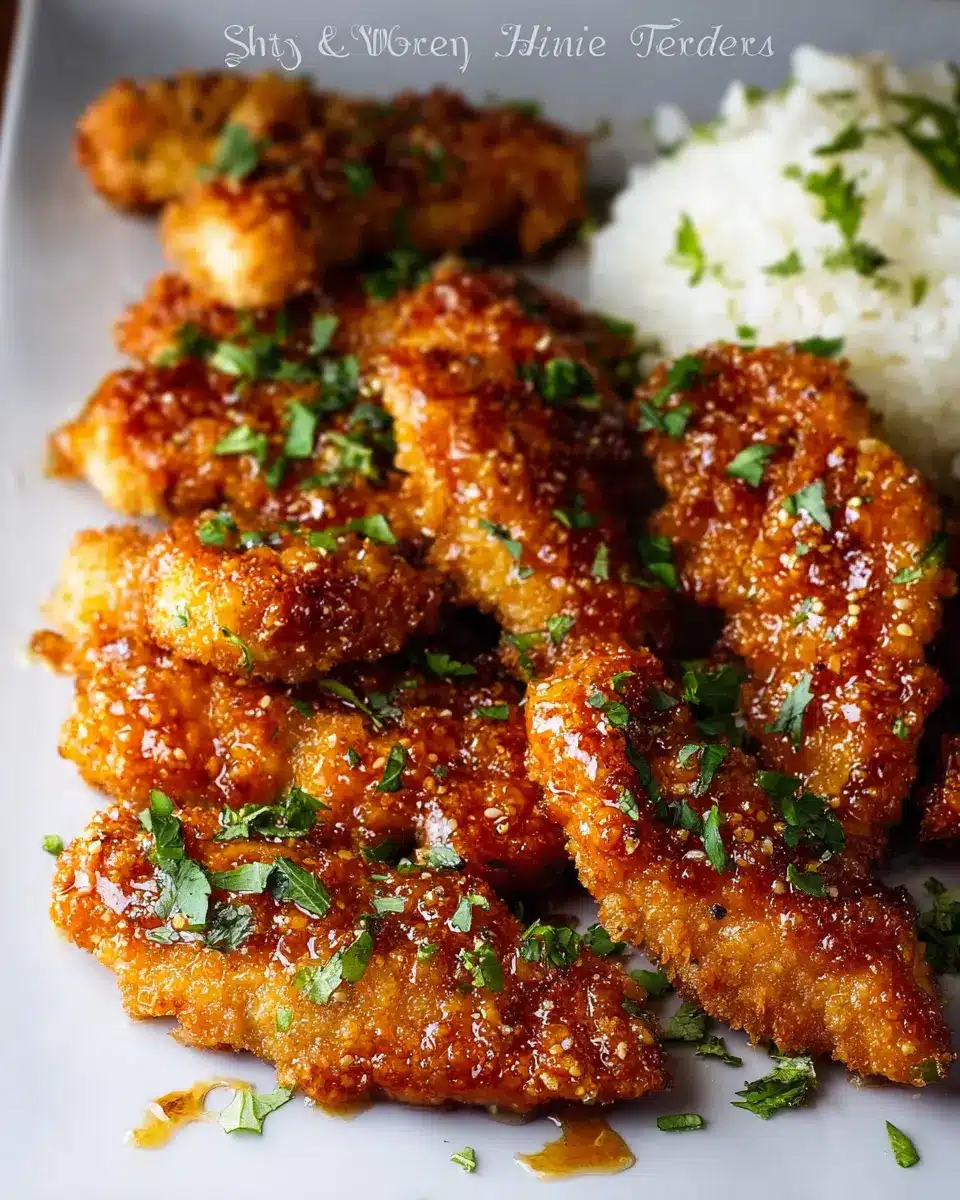
Serving Suggestions for Sticky Honey Garlic Chicken Tenders
Pairing with sides
When serving your sticky honey garlic chicken tenders, think about freshness and balance. These sweet and savory bites complement a variety of sides:
- Crisp Coleslaw: A zesty coleslaw adds a crunch that contrasts beautifully with the tender chicken.
- Steamed Broccoli or Green Beans: The green veggies enhance the meal's nutritional profile while providing a pop of color on the plate.
- Rice or Quinoa: A fluffy bed of rice or nutty quinoa can soak up the extra sauce for an irresistible bite.
Creative serving ideas
For a fun twist on serving these chicken tenders, consider:
- Mini Sliders: Place the tenders in slider buns with fresh veggies and a drizzle of the sauce for a delightful handheld meal.
- Salad Wraps: Use large lettuce leaves to create wraps filled with sticky honey garlic chicken tenders, shredded carrots, and cucumber for a fresh, low-carb option.
- Party Platter: Serve as appetizers alongside dipping sauces like ranch or sriracha for guests to enjoy at gatherings.
Experiment and enjoy the endless ways to savor your sticky honey garlic chicken tenders!
Time Breakdown for Sticky Honey Garlic Chicken Tenders
Preparation Time
Getting everything ready for your delicious sticky honey garlic chicken tenders takes about 15 minutes. This includes cutting the chicken, setting up your breading station, and mixing up that fantastic sauce.
Cooking Time
Once you're all set, you'll need approximately 25 minutes to bake these tenders. Adjust this based on your cooking method; frying them can be quicker, just keep an eye on that golden color!
Total Time
In less than an hour, specifically 40 minutes, you can have a hearty meal that’s sure to wow your taste buds. Perfect for a busy weeknight or a leisurely weekend dinner!
Just think of the satisfaction of creating this dish from scratch and diving into the sweet, sticky goodness. If you're looking for more cooking tips and techniques, check out this guide on baking chicken perfectly, which can elevate your cooking skills even further!
Nutritional Facts for Sticky Honey Garlic Chicken Tenders
Understanding the nutritional aspects of your meals can help you make informed choices. Here’s a breakdown of what to expect from these delicious sticky honey garlic chicken tenders:
Calories
Each serving contains approximately 537 calories. This makes it a satisfying dish without going overboard on your daily intake.
Protein
Packed with around 54 grams of protein per serving, this recipe is perfect for those looking to meet their protein needs, whether you're an active lifestyle enthusiast or simply want a hearty meal.
Sodium
It’s worth noting that the sticky honey garlic chicken tenders contain about 2208 mg of sodium. If you’re watching your salt intake, consider adjusting the soy sauce or opting for a low-sodium version to enjoy while keeping your health goals in check.
For more details on creating a balanced diet, check out resources from The American Heart Association or Nutrition.gov. Enjoy your cooking!
FAQ about Sticky Honey Garlic Chicken Tenders
Can I fry these chicken tenders?
Absolutely! You can achieve a crispy texture by frying the sticky honey garlic chicken tenders instead of baking them. Heat oil to 375°F and fry for about 3-5 minutes per side until they're golden brown and cooked through. For detailed frying instructions, check our sister site for fried chicken tenders.
How can I make these tenders healthier?
If you’re looking to lighten up your sticky honey garlic chicken tenders, consider these easy swaps:
- Use whole wheat breadcrumbs instead of regular panko to increase fiber.
- Bake instead of fry. While frying offers extra crunch, baking within this recipe keeps things a bit healthier.
- Add more veggies! Serve the tenders with a side of steamed broccoli or a fresh salad for a nutrient boost.
What can I serve with these chicken tenders?
These tenders pair wonderfully with a variety of sides. Consider:
- Steamed vegetables like broccoli or green beans for a nutritious balance.
- A citrus salad to enhance the sweetness of the sauce.
- Steamed rice or quinoa to soak up that delicious sticky sauce.
Feel free to get creative! Your sticky honey garlic chicken tenders are versatile and can complement many sides.
Conclusion on Sticky Honey Garlic Chicken Tenders
These sticky honey garlic chicken tenders are not just a delicious option for weeknight dinners, but also an easy recipe to impress family and friends. Whether baked for a healthier twist or fried for that signature crunch, this dish offers a perfect blend of flavors. Enjoy your cooking adventure!
Sticky Honey Garlic Chicken Tenders
Equipment
- Baking Sheet Pan
- parchment paper
Ingredients
for the chicken strips
- 2 pounds boneless skinless chicken breast or chicken tenderloins
- 1 cup panko bread crumbs or regular bread crumbs
- 2 units eggs
- ¾ cup all-purpose flour or more if needed
- 1 teaspoon kosher salt
- fresh cracked black pepper to taste
- optional additional seasonings additional salt & pepper, crushed or minced garlic, garlic powder, smoked paprika, etc.
for the sweet and sticky honey soy sauce
- ½ cup ketchup
- ½ cup honey
- ¼ cup soy sauce or fish sauce, start with 2-3 tablespoons
- 1 Tablespoon chili garlic sauce or any hot sauce, optional
- 2 Tablespoons fresh lime juice or rice vinegar
- 1 teaspoon cornstarch
Instructions
Preparation Steps
- Pre-heat oven to 425°F (220°C). Prepare 1-2 baking sheets lined with parchment paper.
- If using chicken breasts, cut into thin strips. Make sure the strips are consistently sized for even baking.
- In a bowl, add panko or breadcrumbs. In another bowl, beat the eggs. In a third bowl combine flour, teaspoon of salt, and black pepper.
- Dredge each strip of chicken in flour, then egg, then Panko or breadcrumbs. Lay coated chicken strips on sheet pan. Repeat for all chicken strips.
- Bake chicken strips at 425°F (220°C) for about 15 minutes. Flip the chicken strips to the other side up.
- Continue to bake for another 5-10 minutes or until crisp and cooked through.
- While the chicken is baking, make the sauce by whisking together all the sauce ingredients: ketchup, honey, soy sauce (or fish sauce), chili garlic sauce, fresh lime juice or rice vinegar, and cornstarch.
- Heat a large skillet over medium heat. Add half of the chicken strips and half of the sauce. Toss to coat and cook for about 30 seconds to 1 minute on each side.
- Repeat with the remainder of sauce and chicken strips. Don't let the pan get too hot to avoid drying up the sauce.

Leave a Reply