
Introduction to Homemade Garlic Knots
Who doesn't love freshly baked bread? When it comes to indulgent treats that pair perfectly with meals or stand alone as a delightful snack, homemade garlic knots are a game changer. These soft, buttery knots are bursting with savory garlic flavor and a hint of herbs, making them a hit at dinner parties or casual family meals.
Why homemade garlic knots are a game changer
Making garlic knots from scratch elevates your culinary game. Not only do you get to enjoy the warm, inviting aroma of fresh bread wafting through your kitchen, but the transformative process of kneading dough can be incredibly satisfying. The best part? You can customize your knots to suit your taste! Want a little extra cheese? Go for it! Prefer a lighter touch of garlic? No problem!
Additionally, by preparing these garlic knots at home, you’re controlling the ingredients—no preservatives or mystery additives. Plus, serving your own homemade bread is a fantastic way to impress guests or create lasting memories around the dinner table. As you pull them from the oven, golden and gooey, you’ll understand why they are a staple in many households.
Ready to get baking? Let’s dive into the delicious details of this irresistible recipe!
Ingredients for Homemade Garlic Knots
Essential Components of the Dough
To create the perfect base for your homemade garlic knots, you'll need a few essential ingredients for the dough. Start with warm water (around 100–110°F) to help activate the yeast. Next, include instant yeast, which gives your dough that lovely rise, and a touch of granulated sugar to feed the yeast. To bring it all together, add olive oil or melted butter, plus salt to enhance the flavor. Don't forget the garlic powder, which adds a subtle garlic kick right in the dough! Finally, you’ll need all-purpose flour (about 3.5 cups) to achieve that fluffy texture.
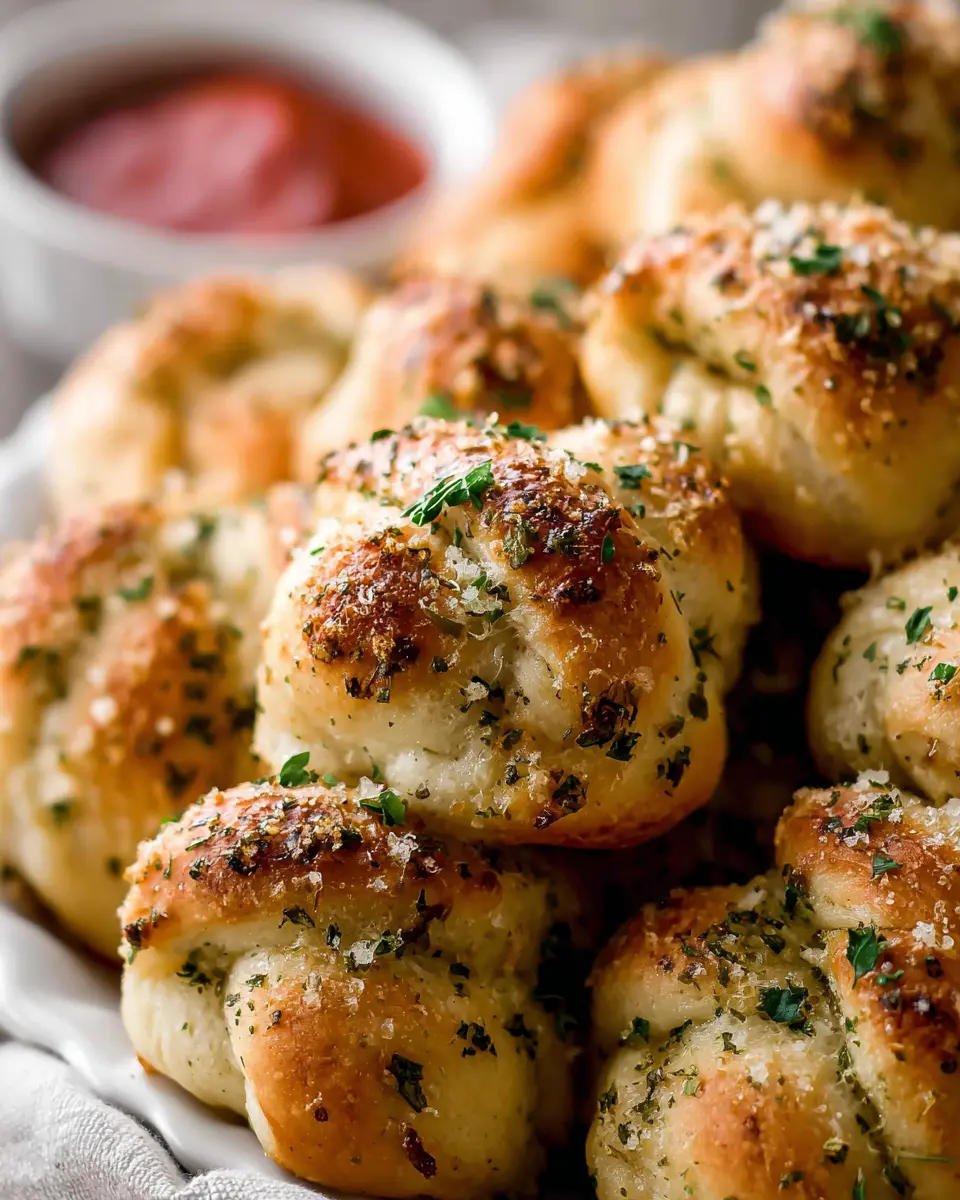
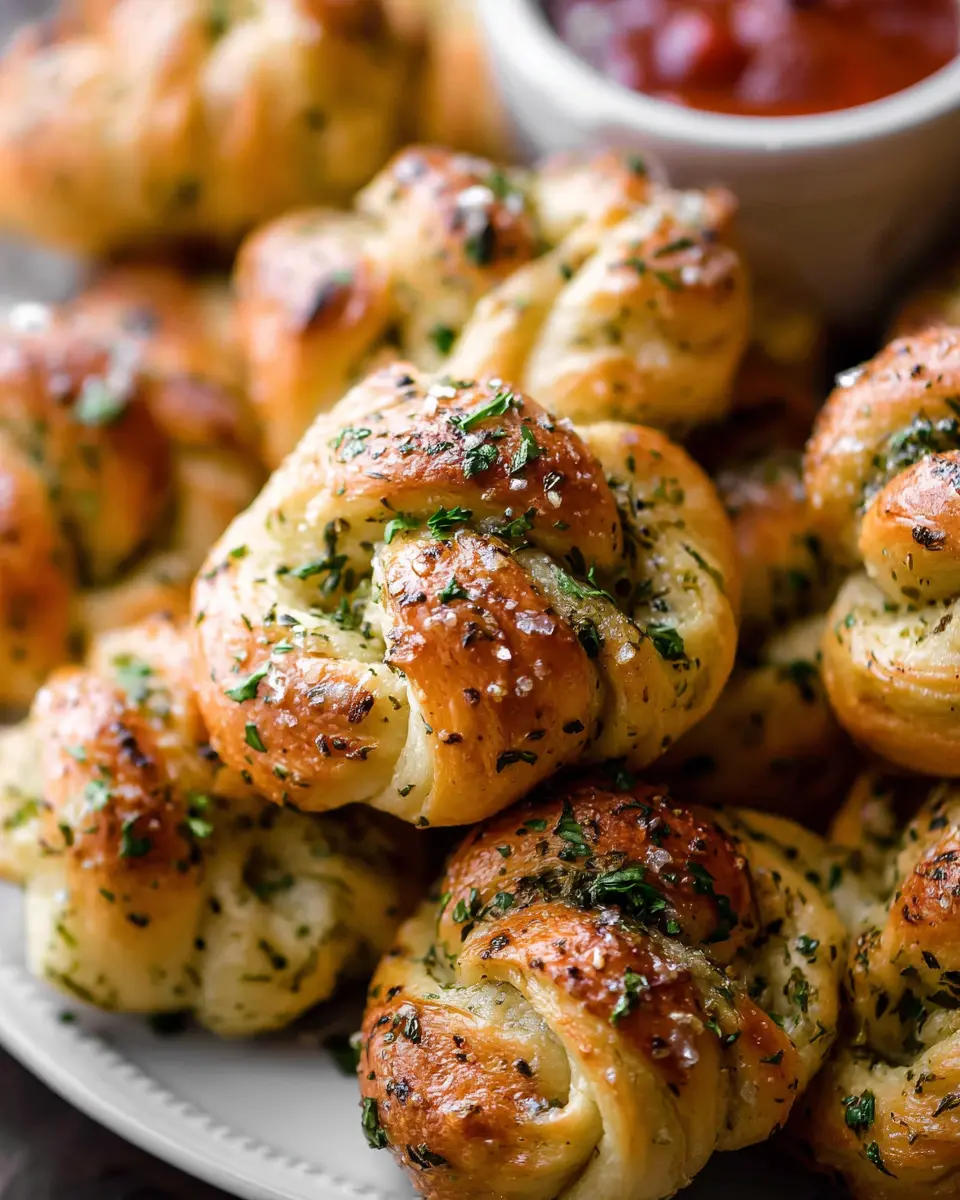
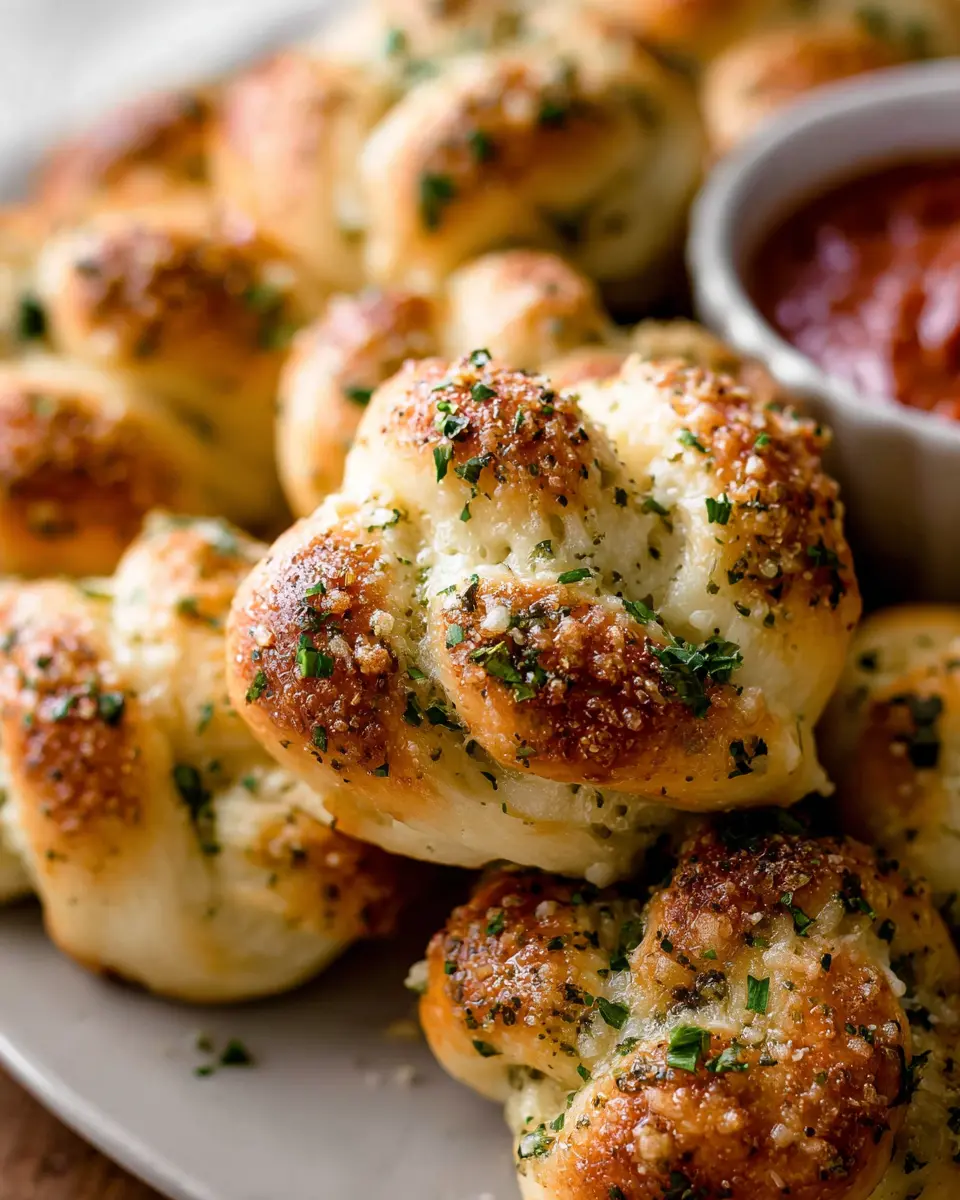
Flavorful Toppings for the Knots
Once your dough is prepared, you'll want to elevate those knots with delightful toppings. Melt unsalted butter and mix in minced garlic or garlic powder for an aromatic butter wash that you'll brush on before and after baking. A sprinkle of Italian seasoning and a dash of salt brings everything together beautifully. For an added touch, consider finishing with grated Parmesan cheese and fresh parsley after baking! This combination not only enhances the flavor but also adds a touch of color, making your knots irresistible.
Step-by-step Preparation of Homemade Garlic Knots
Creating homemade garlic knots from scratch is a rewarding experience that results in soft, buttery knots bursting with flavor. Follow these simple steps, and you'll impress yourself and anyone lucky enough to share them!
Prepare the dough
Start by whisking together 1 and ⅓ cups of warm water (ideally between 100–110°F), 2 and ¼ teaspoons of instant yeast, and 1 tablespoon of granulated sugar in the bowl of your stand mixer. Let this mixture sit for about 5 minutes until it bubbles, indicating that the yeast is activated. If you don’t have a stand mixer, no worries! A large mixing bowl and a sturdy wooden spoon will work just fine.
Once the yeast is bubbly, add 3 tablespoons of olive oil, 1 teaspoon of salt, ½ teaspoon of garlic powder, and about 3 and ½ cups of all-purpose flour, mixing until combined. Your dough may still be a bit sticky, but don’t fret – that’s perfectly normal!
Knead and rise
Kneading is where the magic happens. If you're using a stand mixer, switch to the dough hook and knead for about 5 minutes. If kneading by hand, work the dough on a lightly floured surface until it’s just smooth and elastic. It may take some muscle, but you'll get a great workout! After kneading, place the dough in a lightly greased bowl, cover it, and let it rise in a warm spot for 1 to 2 hours, or until doubled in size.
Shape the knots
Once your dough has risen, punch it down (this is the fun part) to release some air. Transfer it to a floured surface and form it into a 16×5-inch log. Cut the log into 16 strips and roll each strip into 8-inch ropes. Now, tie each rope into a knot, tucking the ends underneath if you like a neat finish.
Let them rise again
Arrange your shaped knots on a baking sheet lined with parchment paper, and lightly cover them with a kitchen towel. Allow them to rise for an additional 30 to 45 minutes. You’ll notice they puff up a bit during this time – and that’s a great sign!
Bake to perfection
Preheat your oven to 400°F (204°C). Bake those delightful knots for about 20–23 minutes or until golden brown. The aroma that fills your kitchen will be blissful!
Brush with garlic butter
While the garlic knots are baking, melt 5 tablespoons of unsalted butter and mix in minced garlic, Italian seasoning, and a pinch of salt. When the knots come out of the oven, brush them with this buttery goodness. You can also sprinkle some grated Parmesan cheese and chopped fresh parsley for an extra layer of flavor!
Lastly, serve your homemade garlic knots warm, perhaps alongside a side of marinara sauce for dipping. Enjoy the process and the delicious results! For more delicious bread recipes, check out King Arthur Baking for additional tips.
Variations of Homemade Garlic Knots
Cheese-Filled Garlic Knots
Why settle for plain when you can elevate your homemade garlic knots with a cheesy surprise? Simply take your prepared dough and stuff each knot with a generous cube of mozzarella or your favorite cheese before knotting. As they bake, the cheese will melt delightfully, creating a gooey center that’s hard to resist. For an extra cheesy touch, sprinkle some grated Parmesan on top just before serving.
Herbed Garlic Knots
If you love fresh flavors, consider adding herbs to your homemade garlic knots. Mix finely chopped fresh rosemary, thyme, or parsley into the garlic butter topping for an aromatic twist. Not only do the herbs enhance the visual appeal, but they also infuse the knots with delightful flavor that pairs perfectly with your favorite pasta dish or marinara sauce. Experiment with your favorite herbs to make them uniquely yours!
For more exciting variations and tips on perfecting your baking, check out The Kitchn's guide to garlic bread alternatives.
Cooking Tips and Notes for Homemade Garlic Knots
Preventing overly sticky dough
To ensure a smooth experience making your homemade garlic knots, it's essential to manage the dough's stickiness. If the dough feels too wet, sprinkle in flour, one teaspoon at a time. Remember, a little flour can go a long way—adding too much can lead to dry knots. It’s all about finding that balance!
Achieving the perfect golden brown exterior
For that beautiful, golden-brown crust on your garlic knots, preheat your oven to the correct temperature and avoid overcrowding the baking sheets. Rotate the pans halfway through baking to ensure even cooking. Don't forget to brush on the garlic butter before and after baking for added flavor and a gorgeous shine that will make them irresistible.
For further guidance, visit King Arthur Baking for expert tips on bread making!
Serving Suggestions for Homemade Garlic Knots
Pairing with sauces
When it comes to enjoying your homemade garlic knots, sauces can truly elevate the experience. Classic marinara or a rich pizza sauce is a must-have pairing, providing a comforting, tangy contrast to the buttery, garlicky flavors. For a twist, try a zesty pesto or a smooth roasted red pepper dip for a fresh and vibrant touch. These dips not only complement the knots but also add a burst of flavor that your taste buds will love.
Flavor-rich dips to enhance the experience
To take your homemade garlic knots to the next level, consider serving them with delicious, flavor-packed dips. A creamy garlic aioli can enhance the knots' garlicky nature, while a spicy sriracha mayo offers a delightful kick. For something a bit lighter, a herb-infused yogurt dip brings a refreshing element to the party. Not only do these dips make your garlic knots more versatile, but they also invite everyone to customize their bites. Happy dipping!
Time Breakdown for Homemade Garlic Knots
Preparation Time
The preparation for your homemade garlic knots will take about 3 hours. This includes mixing, kneading, and allowing the dough to rise. Don’t worry; the bulk of this time is simply letting the dough do its thing!
Rising Time
Expect the dough to rise for approximately 1 to 2 hours. This step is crucial for developing those fantastic flavors and the light, airy texture you love in garlic knots.
Baking Time
Once your knots are shaped and resting, baking them takes around 20 to 23 minutes. You’ll know they’re ready when they turn a beautiful golden brown!
Total Time
In total, you’re looking at about 3 hours and 25 minutes from start to finish. It might feel like a commitment, but trust me—your patience will pay off with the most delicious garlic knots you've ever tasted!
For more tips on getting the perfect rise from your dough, check out this bread baking guide. Your kitchen will smell amazing, and your friends and family will be asking for seconds!
Nutritional Facts for Homemade Garlic Knots
Calories per Serving
Each serving of these delightful homemade garlic knots contains approximately 150 calories, making them a savory snack or appetizer without overwhelming your diet.
Key Nutrients
These knots are not just tasty but also pack a good nutritional punch. They offer essential nutrients like:
- Carbohydrates: Energy source, about 25g per serving
- Protein: Contains around 4g, supporting muscle repair
- Fat: Healthy fats from olive oil or butter, roughly 6g
Allergen Information
Be mindful if you have allergies; these homemade garlic knots contain gluten, dairy (due to the butter), and garlic. If you're gluten-free or vegan, consider using alternative ingredients like gluten-free flour and plant-based butter.
For more in-depth nutritional insights, check out Nutrition.gov or the USDA FoodData Central. Try enjoying these knots warm with a side of marinara for a delicious twist!
FAQs about Homemade Garlic Knots
Can you make garlic knots ahead of time?
Absolutely! You can prepare the dough and shape the knots up to a day in advance. Just shape them and place them on a baking tray, cover with plastic wrap, and refrigerate. When you're ready to bake, let them come to room temperature for about 30 minutes, then follow the baking instructions. This is a great way to save time for dinners or gatherings!
How do I store leftover garlic knots?
To keep your leftover homemade garlic knots fresh, store them in an airtight container at room temperature for up to 2 days. If you want to enjoy them longer, you can refrigerate them for about a week or freeze them for up to three months. Simply thaw at room temperature and reheat in the microwave or oven for a few minutes to restore their deliciousness.
What can I do with leftover dough?
If you've got leftover dough after making your knots, don’t toss it! You have options! Shape the extra dough into pizza, calzones, or little dinner rolls. You can also freeze it for a quick meal later. Just wrap tightly in plastic wrap and store in a freezer bag. When ready to use, thaw overnight in the fridge, and you're all set!
Conclusion on Homemade Garlic Knots
Celebrating the joy of homemade food
Homemade garlic knots are a delightful way to showcase your love for cooking and share warm, comforting bites with family and friends. The process may take some time, but the satisfaction of creating these delicious knots from scratch is absolutely unbeatable. So roll up your sleeves, and let’s celebrate the joy of homemade food! For more baking tips and delicious recipes, check out Sally's Baking Addiction.

Homemade Garlic Knots
Equipment
- Stand Mixer
- baking sheets
- Pizza Cutter
- Dough scraper
Ingredients
Dough
- 1 cup warm water (between 100–110°F, 38–43°C)
- 2.25 teaspoons instant yeast (1 standard packet)
- 1 tablespoon granulated sugar
- 3 tablespoons olive oil or melted butter
- 1 teaspoon salt
- 0.5 teaspoon garlic powder
- 3.5 cups all-purpose flour (spooned & leveled), plus more for hands and work surface
Topping
- 5 tablespoons unsalted butter melted
- 3 cloves garlic minced or, alternative, 0.5 teaspoon garlic powder
- 1 teaspoon Italian seasoning
- 0.25 teaspoon salt
- 0.25 cup grated Parmesan cheese optional after baking
- 2 tablespoons chopped fresh parsley optional after baking
Instructions
Preparation
- Whisk the warm water, yeast, and granulated sugar together in the bowl of your stand mixer fitted with a dough hook or paddle attachment. Cover and allow to rest for 5 minutes.
- Add the olive oil (or butter), salt, garlic powder, and half of the flour. Beat for 15 seconds, then add the remaining flour. Beat on low speed for 2 minutes.
- Knead the dough for an additional 5 full minutes. If the dough is too sticky, sprinkle flour sparingly as needed.
- Lightly grease a large bowl, place the dough inside, cover it, and let rise at room temperature for 1–2 hours or until doubled in size.
- Shape the dough into a 16×5-inch log and slice into 16 1-inch strips. Roll each strip into ropes and tie into knots.
- Cover the shaped knots and let them rest for at least 30 minutes.
- Preheat oven to 400°F (204°).
- Mix melted butter, garlic, Italian seasoning, and salt for the topping and brush on the knots.
- Bake for about 20–23 minutes or until golden brown. Brush with remaining garlic butter and top with Parmesan cheese and/or parsley, if using.
- Serve plain or with marinara sauce for dipping.

Leave a Reply